Wednesday, June 5, 2013

Free Font Downloads


Here is a list of Fonts I have been having fun with lately. If you want to add these to your collection, just follow their links below! If you want instructions on how to download them to your computer, please see my previous post.


1. Palvosky  2. Things We Said 3. Tusj 4. Cast Iron 5. Colors of Autumn 6. Janda As Long As You Love Me 7. Diehl Deco 8. Fugitiva 9. Channel 10. FT Rosecube

Enjoy!


Tuesday, June 4, 2013

STEP-BY-STEP Font Downloading

For Quite some time, I have wanted to get my hands on a program filled with cute fonts.  Little did I know, they have been right under my nose the whole time... Free!! It's not a program, it's a website- and it allows you to download any font you like for absolutely free. There are also different blogs and websites that give you font trials, which you can find through Pinterest.

All you need is a program that comes with fonts. I have the Microsoft Office Suite, so once a font is downloaded, it automatically goes to each program. (I am not familiar with Mac computers, so this tutorial is only for Windows).

1. Go to www.dafont.com
Here is what you will see:

2. In the box outlined in red, you will see themed fonts. For this example, I chose "Nature" under the "Dingbats" section. (A dingbat is a symbol/character used in place of the Alphabet letters). 


3. Selecting a theme will pull up several different fonts in that category.


4. Pick the one you want, and then double click "Download"

 
5. A small pop-up box comes up on the bottom of the screen. Click on "Open".


6. Several files come up at this point:
 

The files with this symbol next to them will download different variations of the full font. (You may open each one up to see what the differences are. They will not download until you click "Install"
 
(No matter which site I have downloaded fonts, they always look like this).

7. Now You can install.

 
All you will see is this, for 5 to 10 seconds, and then tada! You now have a new font:

 
Here is the new font in Microsoft Word:


Happy Typing!


Tuesday, May 21, 2013

Family Night Activity Idea


 A few weeks ago, we decided to have a cookie bake-off. It was so much fun and so easy, I thought I would quickly share.

I started off with the recipe on the back of the Nestle Toll House Chocolate Chip Cookies. I hear it's one of the best ones to use. I will share it below.

When the dough was made, we separated the dough into six bowls. Each team got 3 bowls and had to come up with their own flavors. It was an experiment, and we weren't even sure if they would turn out, but I was quite amazed at what we ended up with! You can take the dough any direction, and they turn out perfect. (unless you throw peanut butter into it with extra flour, then you get peanut butter dumplings on top of blobs of cookie).

To make the double chocolate, I added 2 tablespoons of coco powder, 1/2 tsp of vanilla, milk chocolate chips, and chunked bits and shavings of almond bark. (I would have preferred white chocolate, but I didn't have any). They were Really Good....but then again, I made them :)

My husband threw cranberries and almond bark chunks into his. (since he was on the opposing team, I feel the need to find something wrong,  and suggest that he should have added orange peel).

With all my critiquing, however, he still won the popular vote with his coconut- chocolate chip cookies. He used 1/2 tsp of coconut extract and about 1/2 cup of coconut shavings. (keep in mind he was only working with a small portion of the full dough recipe)

Whatever flavor you decide to go with, I think as long as you try to keep the same consistency, they will turn out awesome! What a fun concept of getting several flavors out of one batch of cookies.
Yum.


Monday, May 13, 2013

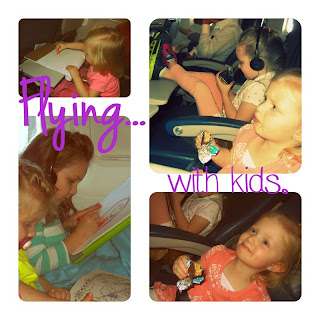
Traveling...with Toddlers.

Since the last post, I have learned all about airport security in a wheelchair, how much ice you can request from the flight attendant, and a week's vacation on crutches, (with 3 kids).  I sprained my ankle while packing for our trip to Georgia. Impeccable timing, I know. We all survived though- and I was shocked at how easy the airport actually was. Based on my own success, I thought I would share a few tips that helped. After all, I do have a set of 2 year-old twins, so I feel some sense of accomplishment.
 

Before I get to the kids-entertainment list, I will just tell you what I learned about the wheelchair experience first.
I brought crutches, so my carry-on was a backpack. I didn't even bother with a purse. We checked our bags and car seats at the curb. (HIGHLY RECOMMENDED) but be ready to tip. Request the wheelchair the second you get there. At both airports, we had to wait for a while for someone to bring one. Be sure to have more "tipping money" than usual. The sweet girl who pushed me around even took my sandals off for me at security. This required her to touch my bare toes. (I felt that act alone deserved a good tip.) And for heavens sakes, take a pair of socks!! Nothing gives me the heebie jeebies like walking barefoot on an airport floor. I kept the socks in my pocket and slipped them on quickly when I took off my shoes. When boarding the plane, I gave one crutch to the flight attendant, and used the other to hop down to my row. They stored my crutches for me after I sat down. After the plain was in the air and the attendants weren't so busy, I asked them for a bag of ice. The bag they brought me was thin and started to leak quickly, but luckily I had a gallon zip-lock bag I slipped it in. It stayed cold the entire flight. The attendants suggested we wait for everyone to get off the plane before we did. It was a great suggestion because we could take our time getting everything together, and I could hop down the isle as slowly as I needed to. A large cart would have been nice for our luggage, but my husband was a genius and somehow latched the suitcases and car seats all together in one large moving pile. (I was fascinated)

So now, I am going to share the list of tips I have for traveling with kids.

1- If you have a portable dvd player, charge it the day before! (I forgot, but then again, I was busy spraining my ankle) Ipads and Ipods are amazingly helpful too, but if you are a parent, you have already figured this out, I'm sure.
2- Bring a set of headphones that your child is comfortable wearing. The ear-buds just don't cut it with my girls. They fall out constantly. We found sets for $5 at Walmart that go over their ears.
3- Pack EMPTY sippy cups. This will get you passed the security point without any problems. You can fill them up with water at a café by your gate.
4-Bring Snacks, and lots of them. I filled quart sized Ziploc bags, with cheerios, but only a third of the way full. This helps with less spilling because the bag is so tall. Other snack ideas were cheese sticks, fruit leather, mini packages of teddy grahams, vanilla wafers, cheez-its, pretzels, suckers, granola bars, raisins, and/or fishy crackers. We also love the peanut butter sandwich crackers because they are a little more filling. We put all of our snack items in a gallon-zip lock bag so that it didn't become a big mess in our carry-on. If someone needed a snack, we just grabbed the bag.
5-Bring coloring books, activity books, and a small bag of crayons. We only gave them 4 crayons each. I didn't want to pick up spilled crayons the entire flight. At the dollar store, they have activity books for preschool-aged kids. My twins love them just because there are so many pictures that they can point to and talk about. I also recommend the flash cards with colors, rhyming words, and counting. These saved our flight home.
6- We flew with Delta, and they had a kids tv station. The episodes were $1 to watch, but once you bought it, you could watch it over and over. I bought a show for each seat, then the girls switched around to watch each other's.
7- Antibacterial wipes are a must if you are a germ-a-phobe like me. I couldn't believe all the gunk that came off the little tray tables that pull down. Yuck! I sanitized the seat belt buckle, the arm rests, even the tv screen. If it actually removed all the germs, who knows- but I was able to relax a little while flying.
8-Bring a light-weight blanket for each child. This relaxed them, just having one over their legs. and when they were tired, they just bunched up the corner and used it as a pillow. I had them pack them in a small back-pack carried by my 5 year old.
9- For parental sanity, my husband and I listened to the comedy station on the Delta "Listen" section. The entire radio section in the Delta Entertainment is free. It made the flight a little more pleasant.
10- Distract the kids during landing, and turn up the air vents above you. On the first flight, one of my girls got motion sickness  and another was scared. The second time around, I gave them a sucker, looked at flashcards together to keep their minds occupied.
11- Luggage:  Ziploc bags. Buy a whole box and organize your suit cases with them, labeled. We only took 2 large cases because Delta no longer does free-checked bags.  I put socks, undies, and tanks in one bag for each child. Swimming clothes also went in one bag. I even organized my stuff that way. The suit cases were filled with bags, but I couldn't believe how organized we stayed while living out of them for 7 days!
12- Borrow pack-and-plays if you can. We have friends in Georgia, so my mother-in-law was able to borrow some for our trip. We were SO grateful. This meant $100 less in luggage checks.
13- Last tip: I used to buy the diapers when we arrived to our vacation spot. But now I say to pack them. As we used up the diapers, we then had room for our souvenirs and random items we were purchasing on our vacation. We didn't have to worry about added weight.

Few! That's a lot more than I meant to write. It's good to be prepared though, because it means a more relaxing vacation. (As relaxing as it can be with little kids).


Enjoy Your Flight!


Wednesday, April 17, 2013

Coffee Filter Flowers


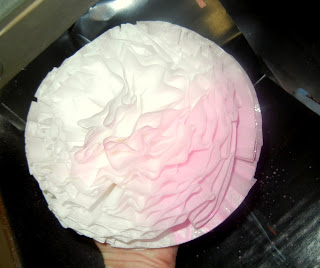
Did you know that you can paint coffee filter flowers AFTER you have made them???? I didn't until a couple of days ago. My friend and I spent one afternoon making several large flowers for an upcoming shower. After all of that invested time, I decided that I would prefer to have some of them colored. I had seen other blogs dye the individual coffee filters before making the actual flowers... but that was no longer an option to me. So- after a days worth of brainstorming, I decided to try painting them using a spray bottle and watered-down paint. It worked! And, they turned out beautiful!!
 
I am going to first show you how to make the flowers, and then I will show you how to paint them.
 
To Make them, you will need:
 
-1 pack of coffee filters (I bought mine at the dollar store)
-1 sheet of card stock
-hot glue gun and up to 4 glue sticks
-stapler
 
1- fold one filter in half.
2- fold it in half again.
3- staple the tip.  (Now make a million of these, following steps 1-3. Ok, maybe just 20 or so.
4- trace and cut a circle out of card-stock. (I traced around a mug and I loved the size it made)
5- hot clue the tips inside the circle, as close to the middle as you can get.
6- continue gluing around until you meet the first glued piece.
7- for the second layer up, glue the filters over the open gaps formed from the bottom layer. In the end, your flower will look full all the way around, so this step is important.
8- keep going until you don't have any more room to go. It will fill in itself.  If the rows look a little un-even when you are done, you can trim them down with scissors. (which I did many times)

 
Ok, now for the fun part:   Painting them!!


To Paint them, you will need:
 
-3 to 8 drops of acrylic paint (I get the cheapest kind at Hobby Lobby or Joann's)
-1 cup water
-1 spray bottle, a good quality one. (the cheap one I got from the dollar store pooped out on me after 1 flower, so you really do need something a little nicer)
-news paper and/or wax paper (used for drying, but not completely necessary)
-rubber gloves (also not necessary, but easier for cleanup)
 
1- Take the spray bottle and fill it with 1 cup of water.
2- Drop the drops of paint into the bottle. The stronger you want the color, the more drops of paint you need to use, obviously.
3- Line your kitchen sink with newspaper.
4- Put the lid back on the spray bottle (it helps), and then shake it like crazy.
5- Wearing your rubber gloves, hold the flower by the bottom and spray 6" away. The color goes on immediately, and will be easy to determine how evenly it is going on.


After I sprayed a few of my flowers, I went back over with a slightly darker, stronger paint color and sprayed mostly into the core of the flower. The results were awesome!!
 
 6- Set the flower on wax paper to dry. The wax paper will allow you to pick the flower up once it is dried without tearing. (I didn't discover this trick until I did the next set of flowers...so my pictures show newspaper).
 
 
Half- way through the drying process, I set them on top of short cups so that the petals could open up and dry more quickly. Doing this also gave it more "volume" and made it look more like a flower.
 
 
Here are the three colors I have tried so far. I think turquoise would be really pretty also:
 

At this point, You can lay them around the room, group them on a food table, stick them to the wall, or even attach two back-to-back and hang them from the ceiling.
They are so fun and so pretty!! 


*Did you do this project? Send a picture!
Your picture may be featured on My Idea of Home.

Monday, April 8, 2013

30 Minute BBQ Chicken Pizza

 
I am about to share with you my secret weapon meal. It is fast, it is easy, and it is so SO good. It's a "secret weapon" because everyone thinks I put a lot of time into it. It's perfect for last minute guests and the recipe is usually requested by the end of the evening. Needless to say, we LOVE it. 
I first tried it when my Step-Mom whipped one up for us. I couldn't get enough!! I have since added a few touches of my own. The most important part of this recipe is the Parmesan cheese. It adds so much to the flavor. So to her, I am very grateful!
 
The dough recipe is what makes this so fast. It's a 5 min dough found here on Allrecipes.com. (written out below).
 
 
Dough:

1 (.25 ounce) package active dry yeast, OR 1 tbsp. active dry yeast
1 teaspoon white sugar
1 cup warm water (110 degrees F/45 degrees C)
2 1/2 cups bread flour, or all purpose flour works too
2 tablespoons olive oil
1 teaspoon salt
1 tbsp. cornmeal (optional)
 
Topping:
1 tbsp. butter or olive oil
1/2 onion
1/2 tsp minced garlic or dash of garlic powder
1 can chicken or 2 chicken breasts cooked and shredded
1/2 to 1 cup BBQ Sauce of your choice. (I use Sweet Baby Ray's)
1 cup cheese, shredded
1 cup Parmesan cheese, shredded (you may also use grated, but 1 cup may be too much. Just sprinkle it on evenly. )
 
 Directions:
 1.Preheat oven to 450 degrees F (230 degrees C). In a medium bowl, dissolve yeast and sugar in warm water. Let stand until creamy, about 10 minutes. It should look like this:
 
 
2.In a separate bowl, add the flour, salt, and oil. Add the yeast mixture and beat until a ball forms.  Let rest for 5 minutes.

 
3. Cook onion in butter until translucent. Add garlic and cook for 1 min. Add chicken and toss around for 3 to 4 min or until it starts to lightly brown. Add BBQ sauce. Put in as much as you want to make sure the chicken is completely covered in it.
 
 
4.Turn dough out onto a lightly floured surface and pat or roll into a round. Transfer crust to a lightly greased pizza pan or square cookie sheet dusted with cornmeal (optional).
(To save time, I actually take the dough straight from the bowl and roll out right into the pan. It's not as beautiful, but once the toppings are on, no one will ever know)
 
5. Pour BBQ chicken mixture over pizza dough, then sprinkle with both kinds of cheese.
 
My picture below is in need of explanation that you may find comical. I have three girls with rather particular taste buds. One prefers the red marinara sauce (I recommend Costco's Kirkland brand sauce. SO good). Another prefers no sauce at all- just cheese. And the last eats the BBQ with us. Basically, I cater to their picky eating habits with this meal and make a 3 flavor pizza. It takes only 2 seconds more of my time, just to have a peaceful meal. Now that's worth it!!
The Sauce-less portion, or should I just say, "bread sticks", gets quite dry, so I brush on a little melted butter over the dough before I put on the cheese.


Bake in preheated oven for 15 to 20 minutes, or until golden brown. Let baked pizza cool for 5 minutes before serving.
 
Enjoy!
 
Oh, and did I mention, this pizza is SOOO good?


Friday, April 5, 2013

Doll house Make-Over

I went to a yard sale a couple years ago and found this wooden doll house for $4. It was plain and basic, but for just $4, I was willing to see what I could do with it. I wish I would have taken a picture of it before we started painting, but you get the idea. My husband did most of the painting. :)

We used a Satin-finish acrylic paint from Hobby Lobby for about $3. If you were to ever try a project like this, I recommend a satin or high-gloss because it holds up better and is easier to clean.

  
I then purchased scrap-book paper from the specialty section at Hobby Lobby. They will often put it on sale for 50% off. That is the time to do this project. Each sheet will cost $1.99, regular price.
I grabbed each sheet with a matching floor to create bedrooms. The purple flooring is actually a fabric from Joann's which I found it in the fur section.
 
 
The trickiest part was measuring and cutting the paper to fit just right.  Especially the top triangle room. Yikes!!
Once I had everything measured, I used the gloss-lustre Mod Podge (in an orange bottle) to apply the paper to the house. I suggest a small sponge roller or something that will put it on light and even.
 
When laying down the paper, I started at the back, and slowly let it attach up to the front, following it with a rubber scraper to prevent it from bubbling. (I had my husband help me with this part also).
Once all the paper was on, I let the house sit for two days to let the Mod Podge dry and harden as much as possible.
 I then went back over the top of the un-textured paper with two more layers of Mod Podge, so that it wouldn't be damaged easily or bubble if it got wet for some random reason. I used a cheap craft sponge brush for this.
The great thing about Mod Podge is that it goes on white but dries clear. That way I can see how much I am applying and where it is going.
 
I also found windows at hobby lobby. They were in the wood crafts section. I backed them with a Mod Podge-painted blue paper, with hot-glue. I then hot-glued them to the house.
 
As for the roof, we just un-screwed the two pieces from the house, spray- painted them black, and then finished  them with a shimmery glitter spray (my husband's idea... so cute!).
 
 
After a few accessories, it was ready to present!
 
 
This was a fun project, and my girls play with it every single day.
 
 
*Did you do this project? Send a picture!
Your picture may be featured on My Idea of Home.


Pin It