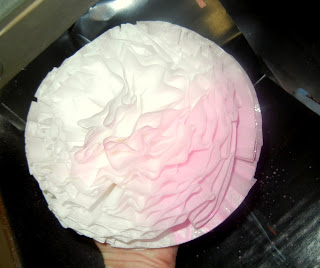
Did you know that you can paint coffee filter flowers AFTER you have made them???? I didn't until a couple of days ago. My friend and I spent one afternoon making several large flowers for an upcoming shower. After all of that invested time, I decided that I would prefer to have some of them colored. I had seen other blogs dye the individual coffee filters before making the actual flowers... but that was no longer an option to me. So- after a days worth of brainstorming, I decided to try painting them using a spray bottle and watered-down paint. It worked! And, they turned out beautiful!!
I am going to first show you how to make the flowers, and then I will show you how to paint them.
To Make them, you will need:
-1 pack of coffee filters (I bought mine at the dollar store)
-1 sheet of card stock
-hot glue gun and up to 4 glue sticks
-stapler
1- fold one filter in half.
2- fold it in half again.
3- staple the tip. (Now make a million of these, following steps 1-3. Ok, maybe just 20 or so.
4- trace and cut a circle out of card-stock. (I traced around a mug and I loved the size it made)
5- hot clue the tips inside the circle, as close to the middle as you can get.
6- continue gluing around until you meet the first glued piece.
7- for the second layer up, glue the filters over the open gaps formed from the bottom layer. In the end, your flower will look full all the way around, so this step is important.
8- keep going until you don't have any more room to go. It will fill in itself. If the rows look a little un-even when you are done, you can trim them down with scissors. (which I did many times)
To Paint them, you will need:
-3 to 8 drops of acrylic paint (I get the cheapest kind at Hobby Lobby or Joann's)
-1 cup water
-1 spray bottle, a good quality one. (the cheap one I got from the dollar store pooped out on me after 1 flower, so you really do need something a little nicer)
-news paper and/or wax paper (used for drying, but not completely necessary)
-rubber gloves (also not necessary, but easier for cleanup)
1- Take the spray bottle and fill it with 1 cup of water.
2- Drop the drops of paint into the bottle. The stronger you want the color, the more drops of paint you need to use, obviously.
3- Line your kitchen sink with newspaper.
4- Put the lid back on the spray bottle (it helps), and then shake it like crazy.
5- Wearing your rubber gloves, hold the flower by the bottom and spray 6" away. The color goes on immediately, and will be easy to determine how evenly it is going on.
After I sprayed a few of my flowers, I went back over with a slightly darker, stronger paint color and sprayed mostly into the core of the flower. The results were awesome!!
6- Set the flower on wax paper to dry. The wax paper will allow you to pick the flower up once it is dried without tearing. (I didn't discover this trick until I did the next set of flowers...so my pictures show newspaper).
Half- way through the drying process, I set them on top of short cups so that the petals could open up and dry more quickly. Doing this also gave it more "volume" and made it look more like a flower.
Here are the three colors I have tried so far. I think turquoise would be really pretty also:
At this point, You can lay them around the room, group them on a food table, stick them to the wall, or even attach two back-to-back and hang them from the ceiling.
They are so fun and so pretty!!
Your picture may be featured on My Idea of Home.


1 comment:
Oh, Wow. This is unbelievable. These are beautiful. I hope mine turn out looking this delicate!
Post a Comment